pedroreinarojas.com


We take a PCB board whose face or faces will be metallic (normally they are thin layers of copper) and….
Preparation or sanitization of the PCB board, as should be done with any PCB, cleaning with solvent and passing with rock wool.
This is important because we are going to go through the development or ferrous etching process, where a corrosive fluid will be responsible for “eating” the copper that is off the tracks and we don't want it.
If the copper has some specific coating or dirt, it might not be attacked by the acid, or it might do so over a very long time causing the acid to exhaust the resistance of the paint and attack everything.
Ideally the paint will be a spray paint.
As far as I know no special characteristics or quality or property is needed in this spray paint. In fact I use a very cheap one bought in a Chinese bazaar in my neighborhood.
The spray paint will give us a very thin layer and very well adhered to the plate, the thinness of the plate will be ideal for the laser, and the adhesion will be ideal for developing/etching.
The ideal color is black, so that the laser is much more effective.
Then we paint a minimalist and superficial face, and we will let it dry.
It does not need a very long time, this is not like the case of adhesives that need a curing time.
In fact, I have used recently painted and undried plates, and I have not had any problems using the laser.
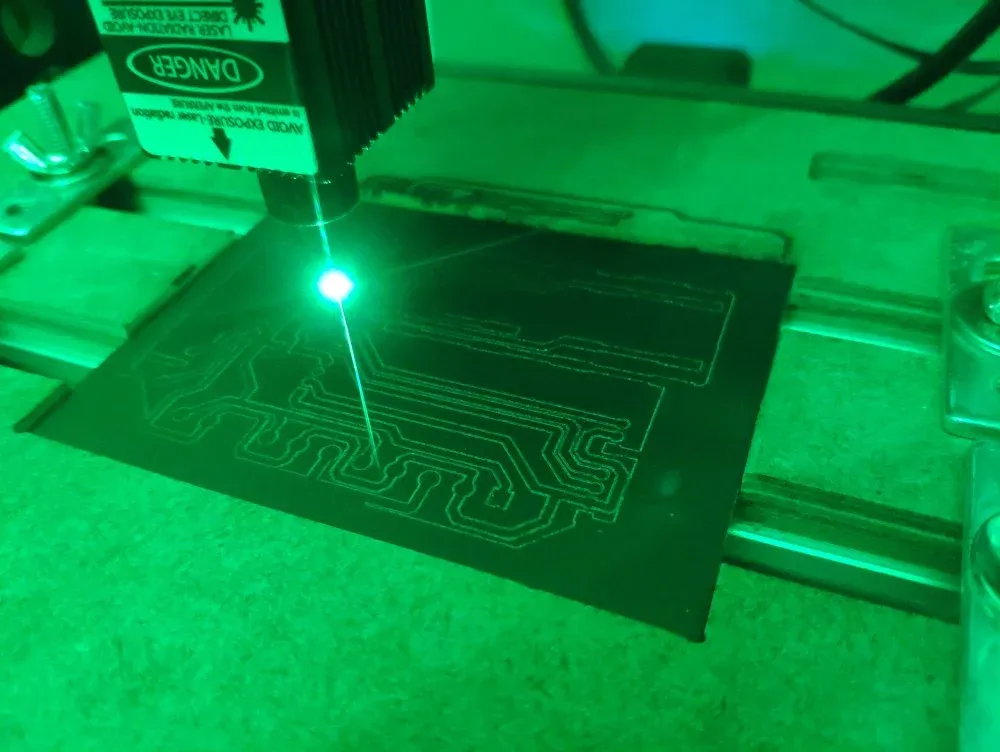
We carry out the engraving process with the laser.
The laser will make the paint exposed to its pointer lose its adhesion to the plate.
The chipped paint will cause the acid to come into contact with the copper, and vice versa the copper protected by the paint will not be attacked by the acid.
The drawing that the laser must apply is the outline of the tracks, the final result being analogous to the offset of the CNC blade.
Representation of what we want to “attack” with the laser:
The paint where the laser has passed will be marked and although it may not seem so, it should be detached from the plate.
The appearance will be more or less like this: (appearance before cleaning)
The tracks will be seen in a white tone, and the definition of these will be The quality of the laser depends on the resolution and the number of passes. We will discuss this later.
We will rub the entire plate with paper and alcohol, without fear, the paint not exposed by the laser will be very very close.
The paper should not be very rough or abrasive, it can be kitchen paper, cotton, etc.
The alcohol that we will use is the typical sanitary alcohol that we find in any first aid kit.
Even if we see that some track has some trace of paint that does not fade, we can rub it more insistently with alcohol and a cotton swab.
The final result after cleaning will be the same, but with the tracks in copper color.


